Video Content Excellence: CapCut Pro Trial Techniques
Creating stunning video content has never been more accessible, yet standing out in today's saturated digital landscape requires more than just basic editing skills. CapCut Pro has emerged as a game-changing tool for content creators, offering professional-grade features that can transform ordinary footage into captivating visual stories. Whether you're a social media influencer, business owner, or aspiring filmmaker, mastering CapCut Pro's advanced techniques can elevate your content from amateur to extraordinary.
The beauty of CapCut Pro lies not just in its powerful features, but in how these tools can be leveraged during your trial period to create professional-quality videos that engage audiences and drive results. Let's dive deep into the techniques that will help you maximize your CapCut Pro experience and create video content that truly excels.
Understanding CapCut Pro's Advanced Interface
When you first launch CapCut Pro, the interface might seem overwhelming compared to basic editing apps. However, this complexity is where the magic happens. The professional timeline offers multiple layers for video, audio, text, and effects, allowing for sophisticated editing workflows that mirror industry-standard software.
Start by familiarizing yourself with the workspace layout. The preview window dominates the center, while your media library sits conveniently on the left. The timeline below is where your creativity unfolds, and the properties panel on the right provides detailed control over every element. This layout isn't accidental – it's designed to streamline your workflow and keep essential tools within easy reach.
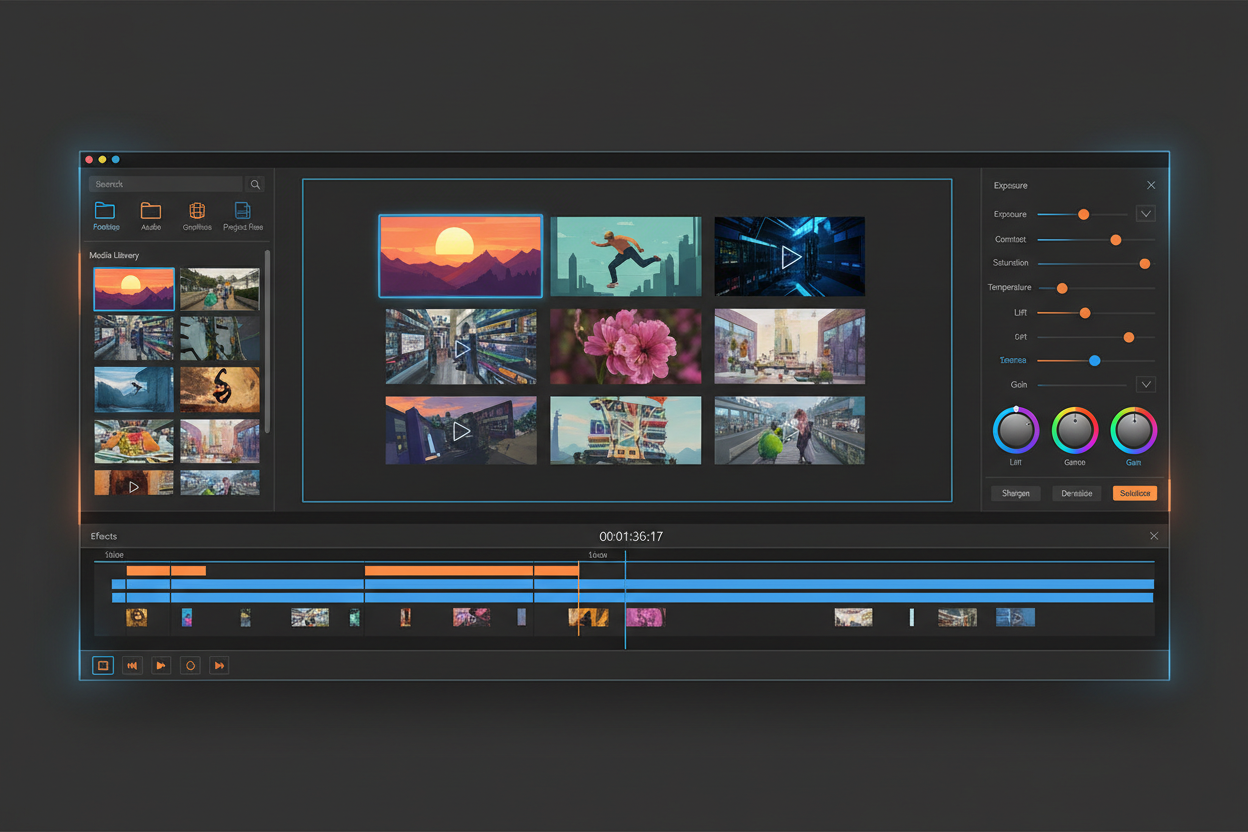
One technique that separates beginners from pros is learning keyboard shortcuts early. While CapCut Pro offers intuitive touch controls, keyboard shortcuts dramatically speed up your editing process. Memorize basic commands like spacebar for play/pause, 'S' for split, and 'Delete' for removing clips. These small efficiencies compound over time, allowing you to focus more on creative decisions rather than technical navigation.
Mastering Color Grading for Cinematic Appeal
Color grading transforms good footage into cinematic masterpieces, and CapCut Pro's color tools rival those found in professional editing suites. The key is understanding that color grading isn't just about making things look pretty – it's about storytelling through visual emotion.
Begin with basic color correction before moving to creative grading. Adjust exposure, contrast, and white balance to ensure your footage looks natural and properly exposed. CapCut Pro's automatic color correction can serve as a starting point, but manual adjustments give you precise control over the mood and atmosphere of your content.
For creative grading, experiment with the color wheels and curves. Warm tones (oranges and yellows) create feelings of comfort and happiness, while cool tones (blues and greens) evoke calmness or melancholy. The teal and orange look, popular in Hollywood films, can be achieved by pushing shadows toward teal and highlights toward orange. This complementary color scheme naturally draws the viewer's eye and creates visual depth.
Don't overlook CapCut Pro's LUT (Look-Up Table) feature. These preset color grades can instantly transform your footage's aesthetic. However, the real technique lies in using LUTs as starting points rather than final solutions. Apply a LUT that matches your desired mood, then fine-tune the intensity and adjust individual color channels to make it uniquely yours.
Advanced Audio Techniques for Professional Sound
Great video content demands great audio, and CapCut Pro provides professional-level audio editing capabilities that many creators underutilize. Poor audio quality can instantly diminish even the most visually stunning content, making audio mastery crucial for video excellence.
Start with proper audio levels. Your dialogue should peak around -12dB to -6dB, leaving headroom for dynamic range while ensuring clarity. CapCut Pro's audio meter helps you monitor these levels in real-time. Consistent audio levels across cuts create a professional listening experience that keeps viewers engaged.
Noise reduction is another powerful technique often overlooked by beginners. CapCut Pro's noise reduction tool can clean up background hiss, air conditioning hum, or other unwanted sounds that distract from your message. Apply it subtly – over-processing can make voices sound unnatural and robotic.
Layering audio creates depth and immersion. Use multiple audio tracks for dialogue, background music, sound effects, and ambient noise. The technique of "audio ducking" – automatically lowering background music when someone speaks – ensures dialogue remains clear while maintaining musical atmosphere. CapCut Pro's automatic ducking feature makes this professional technique accessible to creators at any level.
Motion Graphics and Animation Mastery
Static text and basic transitions are hallmarks of amateur video content. CapCut Pro's motion graphics capabilities allow you to create dynamic, engaging visual elements that capture attention and convey information effectively.
Keyframe animation is the foundation of motion graphics mastery. By setting keyframes at different points in your timeline, you can animate position, scale, rotation, and opacity of any element. The technique of "easing" – adjusting the speed curve between keyframes – creates natural-looking motion that feels organic rather than mechanical.
Text animation deserves special attention since titles and captions are crucial for social media content. Instead of using basic fade-ins, experiment with typewriter effects, word-by-word reveals, or kinetic typography that moves in rhythm with your audio. CapCut Pro's text templates provide starting points, but customizing timing, fonts, and animation paths creates unique branded content.
Particle effects and overlays add production value when used thoughtfully. Light leaks, film grain, and subtle particle systems can enhance mood without overwhelming your content. The key technique is restraint – effects should support your story, not dominate it. Layer multiple subtle effects rather than relying on one dramatic overlay.
Strategic Editing Techniques for Engagement
Technical proficiency means nothing without understanding how editing choices affect audience engagement. CapCut Pro provides the tools, but strategic editing techniques keep viewers watching until the end.
Pacing is crucial for modern attention spans. Vary your cut lengths to create rhythm – quick cuts build energy and excitement, while longer shots allow for emotional connection and information absorption. The technique of "cutting on action" – making cuts during movement rather than stillness – maintains visual flow and feels natural to viewers.
The "hook and payoff" technique works particularly well for social media content. Start with your most compelling moment or question, then build toward revealing the answer or outcome. CapCut Pro's timeline makes it easy to rearrange footage, allowing you to experiment with different narrative structures.
Jump cuts, once considered editing mistakes, are now powerful tools for maintaining pace and removing dead air. However, the technique requires finesse – use cutaway shots, graphics, or slight reframing to make jump cuts feel intentional rather than jarring. CapCut Pro's stabilization tools help ensure smooth transitions between cuts.
Optimizing Export Settings for Different Platforms
Creating excellent content means nothing if it doesn't display properly on your target platform. Each social media platform has specific requirements and optimization techniques that affect how your content performs.
Resolution and aspect ratio choices significantly impact viewer experience. Instagram Stories require 9:16 vertical format, while YouTube performs best at 16:9 horizontal. CapCut Pro's export presets cover major platforms, but understanding the reasoning behind these settings helps you make informed decisions for custom projects.
Bitrate affects both file size and quality. Higher bitrates preserve detail but create larger files that may struggle with slower internet connections. The technique of "two-pass encoding" analyzes your entire video before encoding, optimizing quality throughout the file rather than making frame-by-frame decisions.
Color space considerations become important when your content will be viewed across different devices. Rec. 709 color space ensures consistent appearance across most displays, while HDR content requires careful handling to avoid blown-out highlights on standard displays.
Maximizing Your CapCut Pro Trial Period
Trial periods are opportunities to explore advanced features without commitment, but strategic planning maximizes their value. Create a learning schedule that progresses from basic techniques to advanced workflows, ensuring you experience CapCut Pro's full capabilities.
Start by recreating videos you admire using CapCut Pro's tools. This reverse-engineering approach teaches specific techniques while building familiarity with the interface. Document your process – which features you used, what challenges you encountered, and how you solved them. This creates a personal reference guide for future projects.
Experiment with different content types during your trial. Edit a talking-head video, a product showcase, a music video, and a documentary-style piece. Each format requires different techniques and reveals various aspects of CapCut Pro's capabilities. This variety ensures you understand the software's versatility before making a purchase decision.
Building Your Video Content Strategy
Technical excellence means nothing without strategic content planning. CapCut Pro's capabilities should align with your content goals and audience expectations. Understanding your platform's algorithm preferences helps inform editing choices that increase visibility and engagement.
Consistency in visual style builds brand recognition and audience loyalty. Develop signature techniques – specific color grades, transition styles, or graphic treatments – that become associated with your content. CapCut Pro's custom preset saving feature allows you to maintain this consistency across multiple projects.
Analytics should inform your editing decisions. If retention drops at specific points in your videos, experiment with different pacing, graphics, or audio techniques to maintain engagement. CapCut Pro's flexibility allows for rapid iteration and testing of different approaches.
Conclusion
Mastering CapCut Pro during your trial period requires focused practice and strategic experimentation. The techniques outlined here – from color grading and audio optimization to motion graphics and strategic editing – provide a foundation for creating professional-quality video content that stands out in today's competitive landscape.
Remember that technical proficiency serves storytelling, not the other way around. The most sophisticated effects and flawless execution mean nothing if your content doesn't connect with viewers emotionally. Use CapCut Pro's powerful features to enhance your unique voice and vision, not to mask weak content with flashy effects.
Your trial period is an investment in your creative future. Approach it systematically, document your learning process, and focus on techniques that align with your content goals. Whether you're building a personal brand, growing a business, or pursuing filmmaking dreams, CapCut Pro provides professional-grade tools that can transform your vision into compelling video content that truly excels.
0 Response to "Video Content Excellence: CapCut Pro Trial Techniques"
Post a Comment